
You need another tenth of a gram and the only lever you have is a bigger bead.
So you go up a size. The fly gets down. It also gets a head like a ball bearing, and the thing you were tying stops looking like the thing you were tying.
That is the trade a single bead forces. Weight and profile ride on the same part, so you cannot move one without moving the other. Most of us just accept it and adjust the pattern around whatever bead got us to depth.
The Stone Stack takes that apart.
Three components, one bore
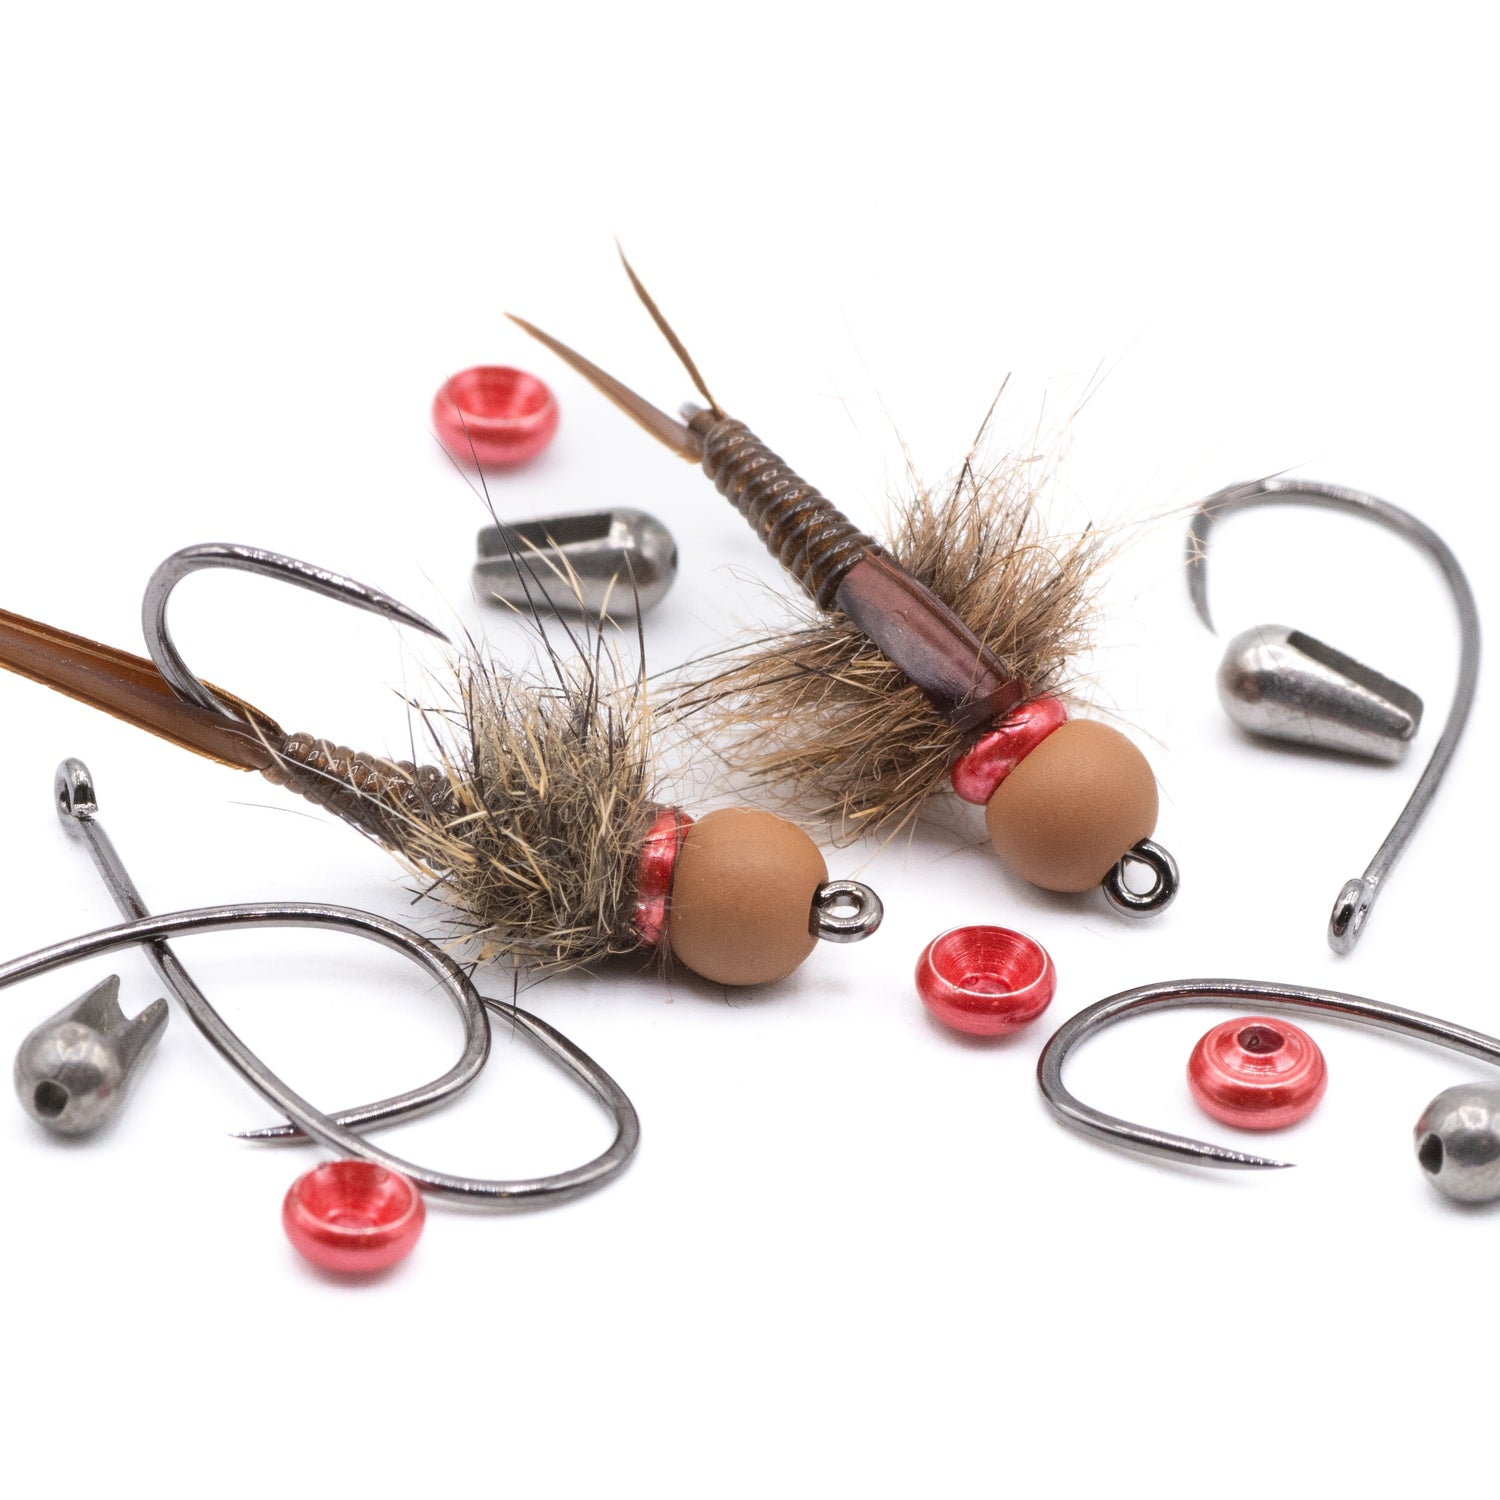
Three Firehole Stones pieces share a through-hole and nest together on the hook shank. Run one, two, or all three.
Tear Drop. A through-hole tungsten body, teardrop-shaped, that slides on like a slotted bead and sits on top of the hook. It puts the mass in the thorax and then tapers into the body, so the weight sits where a real insect carries it instead of stacking at the eye. This is the component that does the heavy lifting.
Stones. The bead. Slotted or round, tungsten, and it forms the head.
Bug Band. A slim machined brass bead, originally the Bug Collar in 2014. Most people run it directly behind the head as a hotspot. Because it is brass rather than tungsten, a Bug Band weighs about a fifth of what a comparably sized tungsten bead weighs. That is the point. It is a fine adjustment, not a weight source.
What each piece actually weighs
Raw, unfinished tungsten. Paint and matte finishes add up to about a hundredth of a gram.
| Size | Slotted Stone | Round Stone | Tear Drop | Bug Band |
|---|---|---|---|---|
| 1.5mm | 0.03 g | not made | - | - |
| 2.0mm | 0.05 g | 0.05 g | 0.10 g | - |
| 2.4mm | - | - | 0.19 g | - |
| 2.5mm | 0.11 g | 0.10 g | - | 0.02 g |
| 2.7mm | - | - | 0.29 g | - |
| 2.9mm | - | - | - | 0.04 g |
| 3.0mm | 0.21 g | 0.18 g | - | - |
| 3.2mm | - | - | 0.40 g | - |
| 3.3mm | - | - | - | 0.07 g |
| 3.5mm | 0.33 g | 0.30 g | - | - |
| 3.6mm | - | - | 0.53 g | - |
| 3.7mm | - | - | - | 0.09 g |
| 4.0mm | 0.48 g | 0.44 g | - | - |
| 4.1mm | - | - | 0.72 g | - |
| 4.3mm | - | - | - | 0.14 g |
| 4.5mm | 0.72 g | 0.69 g | - | - |
A few things fall out of that table.
The lightest thing you can add to a fly is a 2.5mm Bug Band at two hundredths of a gram. The heaviest single component is a 4.1mm Tear Drop at 0.72 grams, which is the same as a 4.5mm slotted Stone. Full stack at the top end runs 1.58 grams. Full range, floor to ceiling, is 0.02 to 1.58.
Slotted runs a little heavier than round at every shared size from 2.5mm up (at 2.0mm they match), because the smaller through-bore leaves more tungsten in the bead. The gap is only a few hundredths, which is deliberate: it means you can move a pattern between a jig hook and a standard nymph hook without redoing the weight math.
And the Bug Band numbers are why it works as a tuning increment. Going from a 3.0mm to a 3.5mm bead adds 0.12 grams whether you wanted that much or not. Adding a 2.9mm Bug Band adds 0.04.
It adds
The components are additive, so the arithmetic is the whole method.
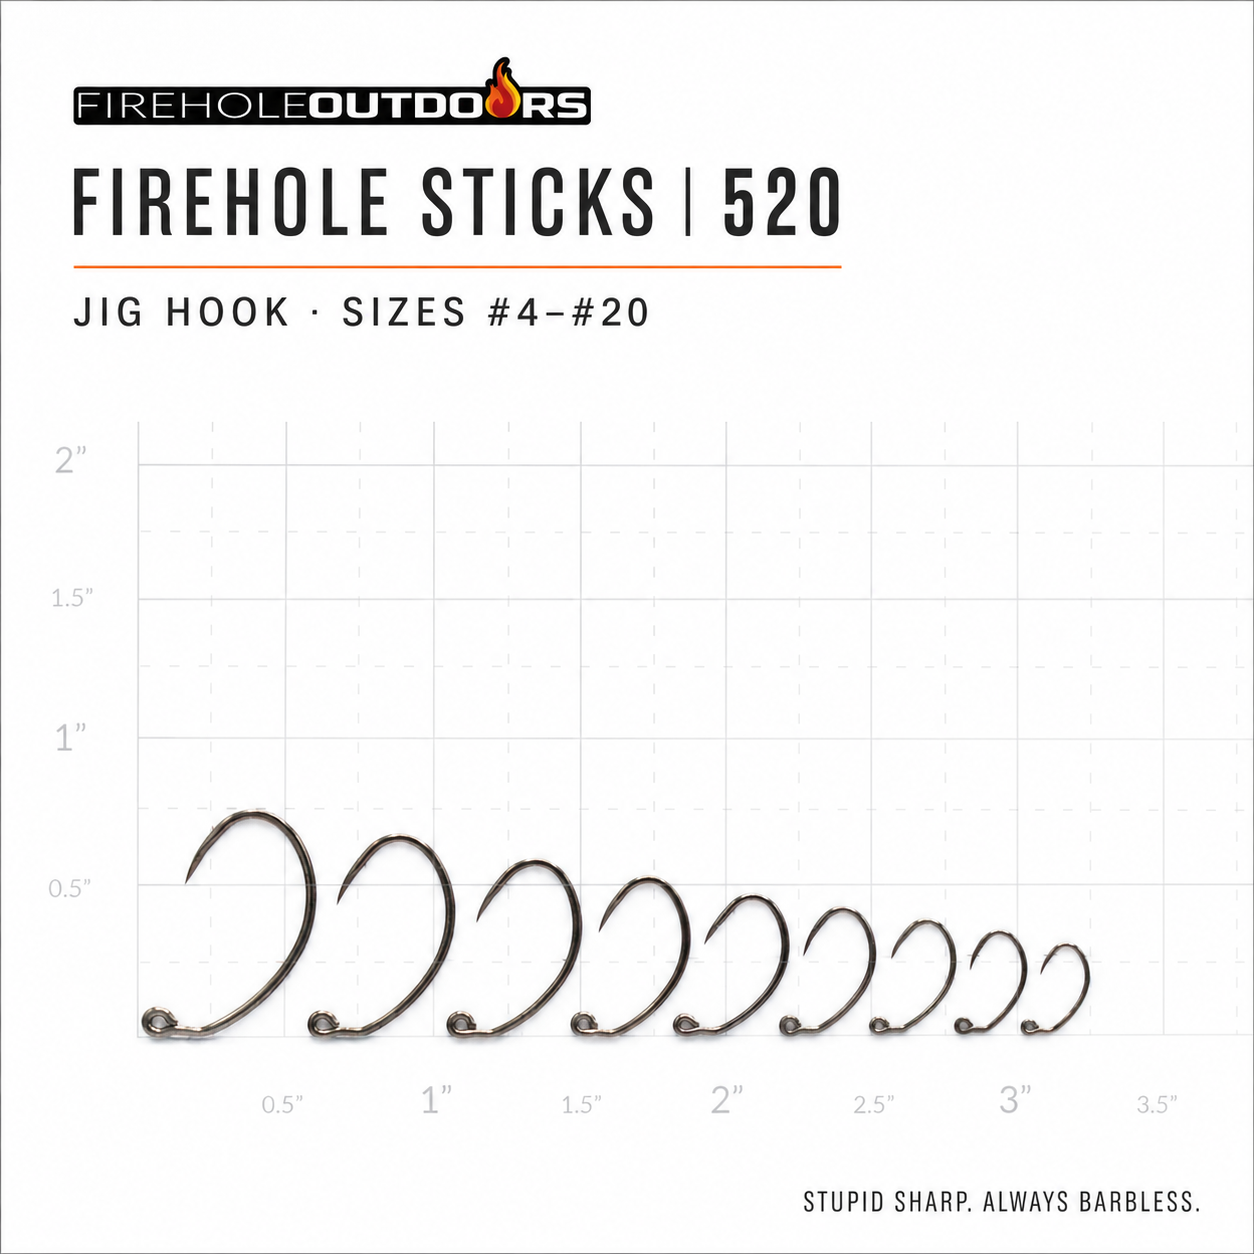
Say you are tying a jig nymph on a 516 in #14 and you want it heavy enough to hold a seam without a split shot.
- 3.0mm slotted Stone: 0.21 g
- 2.7mm Tear Drop: 0.29 g
- 2.9mm Bug Band: 0.04 g
- Total: 0.54 g
Drop the Bug Band and you are at 0.50. Drop the Tear Drop and you are at 0.25. Same head on the fly all three times.
Slotted Stone. All weights in grams.
| Bead | Bug Band | Tear Drop body (mm) | |||||
|---|---|---|---|---|---|---|---|
| 2.0 | 2.4 | 2.7 | 3.2 | 3.6 | 4.1 | ||
| 2.0mm | none | 0.15 | 0.24 | 0.34 | 0.45 | 0.58 | 0.77 |
| 2.5 | 0.17 | 0.26 | 0.36 | 0.47 | 0.60 | 0.79 | |
| 2.9 | 0.19 | 0.28 | 0.38 | 0.49 | 0.62 | 0.81 | |
| 3.3 | 0.22 | 0.31 | 0.41 | 0.52 | 0.65 | 0.84 | |
| 3.7 | 0.24 | 0.33 | 0.43 | 0.54 | 0.67 | 0.86 | |
| 4.3 | 0.29 | 0.38 | 0.48 | 0.59 | 0.72 | 0.91 | |
| 2.5mm | none | 0.21 | 0.30 | 0.40 | 0.51 | 0.64 | 0.83 |
| 2.5 | 0.23 | 0.32 | 0.42 | 0.53 | 0.66 | 0.85 | |
| 2.9 | 0.25 | 0.34 | 0.44 | 0.55 | 0.68 | 0.87 | |
| 3.3 | 0.28 | 0.37 | 0.47 | 0.58 | 0.71 | 0.90 | |
| 3.7 | 0.30 | 0.39 | 0.49 | 0.60 | 0.73 | 0.92 | |
| 4.3 | 0.35 | 0.44 | 0.54 | 0.65 | 0.78 | 0.97 | |
| 3.0mm | none | 0.31 | 0.40 | 0.50 | 0.61 | 0.74 | 0.93 |
| 2.5 | 0.33 | 0.42 | 0.52 | 0.63 | 0.76 | 0.95 | |
| 2.9 | 0.35 | 0.44 | 0.54 | 0.65 | 0.78 | 0.97 | |
| 3.3 | 0.38 | 0.47 | 0.57 | 0.68 | 0.81 | 1.00 | |
| 3.7 | 0.40 | 0.49 | 0.59 | 0.70 | 0.83 | 1.02 | |
| 4.3 | 0.45 | 0.54 | 0.64 | 0.75 | 0.88 | 1.07 | |
| 3.5mm | none | 0.43 | 0.52 | 0.62 | 0.73 | 0.86 | 1.05 |
| 2.5 | 0.45 | 0.54 | 0.64 | 0.75 | 0.88 | 1.07 | |
| 2.9 | 0.47 | 0.56 | 0.66 | 0.77 | 0.90 | 1.09 | |
| 3.3 | 0.50 | 0.59 | 0.69 | 0.80 | 0.93 | 1.12 | |
| 3.7 | 0.52 | 0.61 | 0.71 | 0.82 | 0.95 | 1.14 | |
| 4.3 | 0.57 | 0.66 | 0.76 | 0.87 | 1.00 | 1.19 | |
| 4.0mm | none | 0.58 | 0.67 | 0.77 | 0.88 | 1.01 | 1.20 |
| 2.5 | 0.60 | 0.69 | 0.79 | 0.90 | 1.03 | 1.22 | |
| 2.9 | 0.62 | 0.71 | 0.81 | 0.92 | 1.05 | 1.24 | |
| 3.3 | 0.65 | 0.74 | 0.84 | 0.95 | 1.08 | 1.27 | |
| 3.7 | 0.67 | 0.76 | 0.86 | 0.97 | 1.10 | 1.29 | |
| 4.3 | 0.72 | 0.81 | 0.91 | 1.02 | 1.15 | 1.34 | |
| 4.5mm | none | 0.82 | 0.91 | 1.01 | 1.12 | 1.25 | 1.44 |
| 2.5 | 0.84 | 0.93 | 1.03 | 1.14 | 1.27 | 1.46 | |
| 2.9 | 0.86 | 0.95 | 1.05 | 1.16 | 1.29 | 1.48 | |
| 3.3 | 0.89 | 0.98 | 1.08 | 1.19 | 1.32 | 1.51 | |
| 3.7 | 0.91 | 1.00 | 1.10 | 1.21 | 1.34 | 1.53 | |
| 4.3 | 0.96 | 1.05 | 1.15 | 1.26 | 1.39 | 1.58 | |
Round Stone. All weights in grams.
| Bead | Bug Band | Tear Drop body (mm) | |||||
|---|---|---|---|---|---|---|---|
| 2.0 | 2.4 | 2.7 | 3.2 | 3.6 | 4.1 | ||
| 2.0mm | none | 0.15 | 0.24 | 0.34 | 0.45 | 0.58 | 0.77 |
| 2.5 | 0.17 | 0.26 | 0.36 | 0.47 | 0.60 | 0.79 | |
| 2.9 | 0.19 | 0.28 | 0.38 | 0.49 | 0.62 | 0.81 | |
| 3.3 | 0.22 | 0.31 | 0.41 | 0.52 | 0.65 | 0.84 | |
| 3.7 | 0.24 | 0.33 | 0.43 | 0.54 | 0.67 | 0.86 | |
| 4.3 | 0.29 | 0.38 | 0.48 | 0.59 | 0.72 | 0.91 | |
| 2.5mm | none | 0.20 | 0.29 | 0.39 | 0.50 | 0.63 | 0.82 |
| 2.5 | 0.22 | 0.31 | 0.41 | 0.52 | 0.65 | 0.84 | |
| 2.9 | 0.24 | 0.33 | 0.43 | 0.54 | 0.67 | 0.86 | |
| 3.3 | 0.27 | 0.36 | 0.46 | 0.57 | 0.70 | 0.89 | |
| 3.7 | 0.29 | 0.38 | 0.48 | 0.59 | 0.72 | 0.91 | |
| 4.3 | 0.34 | 0.43 | 0.53 | 0.64 | 0.77 | 0.96 | |
| 3.0mm | none | 0.28 | 0.37 | 0.47 | 0.58 | 0.71 | 0.90 |
| 2.5 | 0.30 | 0.39 | 0.49 | 0.60 | 0.73 | 0.92 | |
| 2.9 | 0.32 | 0.41 | 0.51 | 0.62 | 0.75 | 0.94 | |
| 3.3 | 0.35 | 0.44 | 0.54 | 0.65 | 0.78 | 0.97 | |
| 3.7 | 0.37 | 0.46 | 0.56 | 0.67 | 0.80 | 0.99 | |
| 4.3 | 0.42 | 0.51 | 0.61 | 0.72 | 0.85 | 1.04 | |
| 3.5mm | none | 0.40 | 0.49 | 0.59 | 0.70 | 0.83 | 1.02 |
| 2.5 | 0.42 | 0.51 | 0.61 | 0.72 | 0.85 | 1.04 | |
| 2.9 | 0.44 | 0.53 | 0.63 | 0.74 | 0.87 | 1.06 | |
| 3.3 | 0.47 | 0.56 | 0.66 | 0.77 | 0.90 | 1.09 | |
| 3.7 | 0.49 | 0.58 | 0.68 | 0.79 | 0.92 | 1.11 | |
| 4.3 | 0.54 | 0.63 | 0.73 | 0.84 | 0.97 | 1.16 | |
| 4.0mm | none | 0.54 | 0.63 | 0.73 | 0.84 | 0.97 | 1.16 |
| 2.5 | 0.56 | 0.65 | 0.75 | 0.86 | 0.99 | 1.18 | |
| 2.9 | 0.58 | 0.67 | 0.77 | 0.88 | 1.01 | 1.20 | |
| 3.3 | 0.61 | 0.70 | 0.80 | 0.91 | 1.04 | 1.23 | |
| 3.7 | 0.63 | 0.72 | 0.82 | 0.93 | 1.06 | 1.25 | |
| 4.3 | 0.68 | 0.77 | 0.87 | 0.98 | 1.11 | 1.30 | |
| 4.5mm | none | 0.79 | 0.88 | 0.98 | 1.09 | 1.22 | 1.41 |
| 2.5 | 0.81 | 0.90 | 1.00 | 1.11 | 1.24 | 1.43 | |
| 2.9 | 0.83 | 0.92 | 1.02 | 1.13 | 1.26 | 1.45 | |
| 3.3 | 0.86 | 0.95 | 1.05 | 1.16 | 1.29 | 1.48 | |
| 3.7 | 0.88 | 0.97 | 1.07 | 1.18 | 1.31 | 1.50 | |
| 4.3 | 0.93 | 1.02 | 1.12 | 1.23 | 1.36 | 1.55 | |
Read down to your bead, across to your Tear Drop, and pick the Bug Band row. The none row is the stack without a band.
Stack geometry, if you are wondering how much hook it takes: a 3.0mm bead, 2.9mm Bug Band and 2.7mm Tear Drop together measure 8.54mm from eye to taper. On a #12 516, which is 13.0mm overall, that leaves about 4.5mm behind the taper for the abdomen. On a #14 516 (11.4mm) it is tighter, closer to 3mm.
The part worth stealing
Here is what the arithmetic buys you beyond the fly itself.
Bug Bands come in thirteen colors. Pick five and assign each one a weight. Now the band is not decoration, it is an index, and your box tells you what everything in it weighs at a glance.
Look at a row of finished flies. Which one is 0.30 grams and which is 0.66? You cannot tell by eye, and you certainly cannot tell six months later. But if green means 0.34 and red means 0.53, you can reach into the box in failing light on unfamiliar water and pull the exact sink rate you want.
Most of us solve that problem by tying three of everything and guessing at the vise six months later. A band is a cheaper answer.
What fits what
Tear Drops come in six sizes and not every size clears every hook. The general shape is what you would expect: bigger hooks take bigger bodies, and as you go down through the small sizes the options narrow until only the 2.0mm fits.
A cell marked none shows up at both ends of a row, for different reasons. At the small end the gape runs out before the smallest body does. At the large end it is the wire: on the heaviest hooks the shank is thicker than the bore, and nothing will pass over it.
One hook is out entirely. The 419 is a light wire dry fly hook, and a tungsten body does not belong on it in any size.
Below 2.0mm you are into bead-only territory. Tear Drops stop at 2.0mm, and 1.5mm Stones are slotted only, in raw tungsten plus four plated colors.
For which bead size suits which hook size, that is a separate question with its own chart: Tungsten Bead Size Chart.
| Hook | #1 | #2 | #4 | #6 | #8 | #10 | #12 | #14 | #16 | #18 | #20 | #22 | #24 |
|---|---|---|---|---|---|---|---|---|---|---|---|---|---|
| 315 | · | · | · | EF | CDEF | CDEF | BCD | ABC | AB | AB | A | A | · |
| 316 | · | · | · | DEF | BCDEF | BCDEF | ABCDE | ABCD | AB | A | A | none | none |
| 317 | · | · | · | · | · | BCDEF | ABCDE | ABCDE | ABCD | AB | AB | A | A |
| 320 | · | · | · | · | · | ABCDEF | ABCDE | ABCD | ABC | AB | A | · | · |
| 321 | · | · | · | · | BCDEF | BCDEF | BCDE | ABCD | ABC | AB | · | · | · |
| 413 | · | · | · | · | CDEF | CDEF | ABCD | ABC | AB | A | none | none | none |
| 419 | Not recommended. Light wire dry fly hook. | ||||||||||||
| 511 | · | BCDEF | BCDEF | CDEF | CDEF | · | · | · | · | · | · | · | · |
| 516 | · | · | EF | DEF | DEF | CDEF | ABCDE | ABCD | ABC | AB | A | A | none |
| 520 | · | · | none | EF | CDEF | CDEF | CDEF | BCDE | BCD | ABC | AB | · | · |
| 523 | · | · | EF | DEF | DEF | DEF | CDEF | BCDE | · | · | · | · | · |
| 535 | · | · | · | · | · | CDEF | BCDEF | ABCDE | ABCD | ABC | · | · | · |
| 551 | · | · | EF | DEF | CDEF | CDEF | BCDEF | ABCDE | ABCD | ABC | AB | · | · |
| 570 | F | F | F | F | F | · | · | · | · | · | · | · | · |
| 609 | · | · | · | · | ABCDEF | ABCDEF | ABCDE | ABCD | AB | AB | A | · | · |
| 612 | · | · | · | · | · | BCDEF | BCDEF | ABCDE | ABCD | ABC | · | · | · |
| 618 | · | · | BCDEF | BCDEF | ABCDEF | ABCDEF | ABCDEF | ABCDEF | ABCDE | · | · | · | · |
| 633 | · | · | · | · | · | CDEF | ABCDE | ABCD | ABC | AB | AB | A | · |
| 637 | · | · | · | EF | CDEF | CDEF | CDEF | BCDE | BCD | ABC | AB | AB | · |
| 714 | none | F | F | DEF | DEF | · | · | · | · | · | · | · | · |
| 718 | · | · | CDEF | CDEF | BCDEF | BCDEF | ABCDEF | ABCDE | ABCD | ABC | AB | AB | A |
| 811 | none | none | F | EF | DEF | CDEF | · | · | · | · | · | · | · |
| 826 | DEF | DEF | DEF | DEF | CDEF | BCDEF | · | · | · | · | · | · | · |
| 839 | · | none | F | DEF | DEF | CDEF | BCDEF | ABCDEF | ABCDE | ABCD | · | · | · |
| 860 | F | EF | EF | DEF | CDEF | · | · | · | · | · | · | · | · |
Tear Drops fit hook exists, none fit hook not made in this size
Tear Drop sizes: A 2.0mm, B 2.4mm, C 2.7mm, D 3.2mm, E 3.6mm, F 4.1mm.
Three sizes sit off the edges of that chart, and the two reasons above cover all of them. The 316 comes in #26, which is past the point where any Tear Drop clears the gape, so treat it the same as its #24. The 826 comes in #1/0, where the wire is too heavy for a body to pass over, the same reason a 520 in #4 is out. And the predator hooks, 801P, 802P and 803P, sit outside the Tear Drop range entirely.
Where to start
Three combinations that cover most of what a trout box needs.
Small mayfly nymph, #16 to #18. 2.5mm round Stone, 2.0mm Tear Drop. 0.20 grams. Gets down in a foot of riffle without dragging.
Standard jig nymph, #12 to #14. 3.0mm slotted Stone, 2.7mm Tear Drop, 2.9mm Bug Band. 0.54 grams. The one you tie the most of.
Point fly, #10 to #12. 3.5mm slotted Stone, 3.2mm Tear Drop. 0.73 grams. Anchors the rig.
Tie the middle one first. Then tie it again with the Tear Drop one size up and one size down, fish all three, and you will know more about your water than any chart can tell you.
~John

Leave a comment
All comments are moderated before being published.
This site is protected by hCaptcha and the hCaptcha Privacy Policy and Terms of Service apply.